
How to Use VeraCrypt: Part 1
header image courtesy of WOCinTech Chat
Have you ever thought about encrypting a flash drive or your whole computer? There’s lots of software out there that can do that, but which one should you pick? Many of them are for better for large businesses. Even the programs intended for small businesses or personal use can be expensive; as of this writing, Symantec Drive Encryption is $189 per year. Would you like to do all that for free? Microsoft has the excellent Bitlocker, but it’s not available on the Home editions of Windows. Truecrypt was very good, but it hasn’t been updated since 2014; it may have any number of security issues. Fortunately, there is another option: VeraCrypt.
VeraCrypt is an open-source encryption program that is based on Truecrypt, but with new features. It was first released in June 2013 by the Paris-based company IDRIX. It’s compatible with all versions of Windows since XP, all versions of MacOS since Lion (10.7), Linux, and FreeBSD. It can encrypt not only the hard drives of laptops and desktops, but also flash drives and other removable storage devices.
You can do a lot of things with VeraCrypt, but in this post I’ll show you how to do two things: creating file containers and encrypting flash drives.
How to Create a File Container
A file container is the most basic structure you can build with VeraCrypt. It is essentially a secret folder. For my first effort, I made a file container with a simple password.
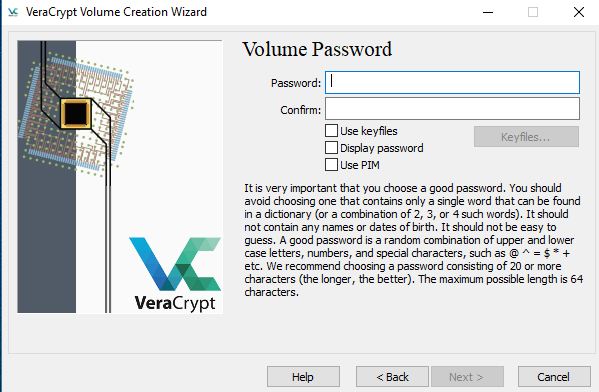
I named this file container New Volume. It looked like a blank page or a file with an unknown extension.

The only way to see your new drive is to mount it; think of mounting as turning a device on. To mount your new file container, open VeraCrypt and press the button Select File. This will take you to the folder on your hard drive where the file container is located. Select the file container, then press Open.
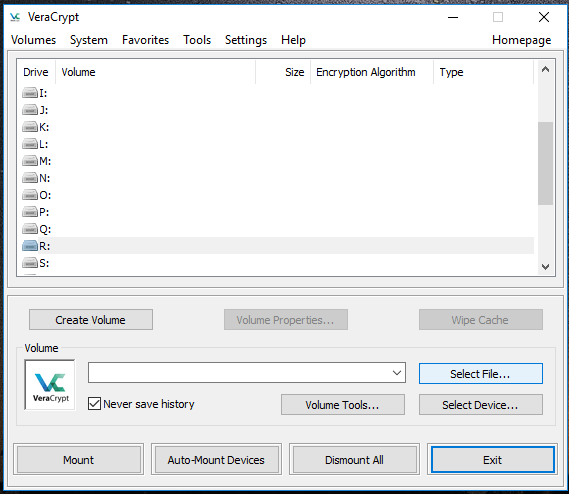
VeraCrypt main menu before mounting New Volume, which is assigned drive letter R:

Menu for mounting New Volume shows options for password entry and keyfiles
After I created the file container, I wanted to add a keyfile. A keyfile is an extra layer of protection that can be combined with your password. All you need to create a keyfile is a file, preferably one that you created yourself. It can be almost any kind of format: a text, an audio file like an MP3, even a video file, as long as the file is at least 30 bytes in size.
I clicked the Volume Tools button. If you’re going to edit a volume with Volume Tools, the volume must be unmounted.

As you can see from earlier screenshots, the Mount menu also has a Keyfiles button. Or, you can generate a keyfile by clicking the Tools menu at the top of the window, then selecting the option Keyfile Generator.
I created a small text file as my keyfile, then saved it on a USB drive. Now before I mount my file container, I have to insert the USB drive with my keyfile on it. After that, I press the Mount button then the Keyfiles button. To bring up my keyfile, I press the Add Files button, which opens the file folder where it’s stored.
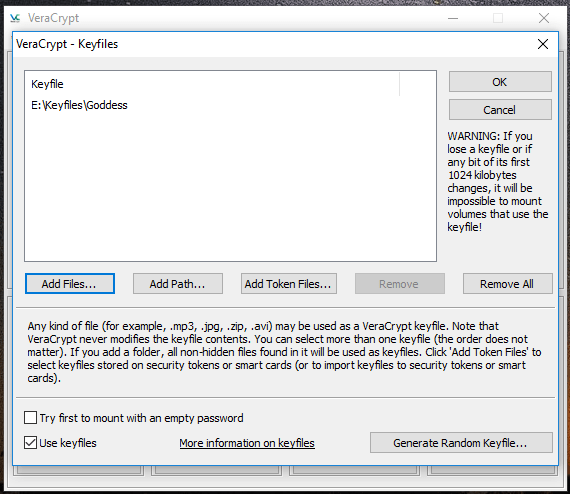
Keyfiles menu after adding keyfile
Never lose or alter your keyfile; if you do, you won’t be able to open your file container.
How to Encrypt a Flash Drive
I decided to try the next step: encrypting a flash drive. This is slightly more complicated than making an encrypted file container. This is what it looks like when you start encrypting your flash drive:
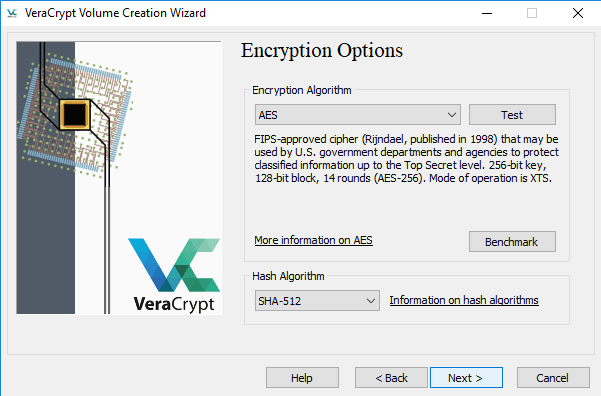
The encryption algorithm I chose is AES (Advanced Encryption Standard). It’s a strong encryption algorithm and the current Federal standard for processing information. This is the same method that Federal agencies use to secure their files, up to and including classified information.
The hash algorithm I picked is SHA-512. VeraCrypt uses hash algorithms for generating master keys, secondary keys, and salt. The last item is random bits of data added to your password, which is then “hashed,” or scrambled so that an attacker can’t figure out your password. SHA (Secure Hash Algorithm) was, in fact, originally developed by the NSA.
Next, I had to select the specific partition on the drive that I wanted to encrypt, even though the drive only had one partition. This software demands precision. Don’t worry if VeraCrypt says “Not Responding” or if it seems sluggish. It takes a while to encrypt things; the bigger the drive, the longer it will take.
Remember: when you format a drive, you will lose everything on the drive. Formatting writes over every bit of space. It’s best to use VeraCrypt to encrypt an empty flash drive, then start putting files on it.

This screenshot was from my first attempt. Look at the option for filesystem. What is that? A filesystem is the way a computer operating system organizes files. It’s not just about folders and the format for filenames, but also things that aren’t immediately visible to the average user. This means metadata, like how files are time stamped and how to restrict access to them.
My first attempt at encrypting the flash drive failed because it, like most small portable drives, had an FAT filesystem. Modern Windows computers and large portable drives formatted for Windows have NTFS filesystems. VeraCrypt can’t change the filesystem that is already installed on your drive. When encrypting a flash drive, you must select whatever file system is already in place.
After encryption, the drive will have two letters: whatever letter the operating system assigns to the drive and the letter you gave the partition through VeraCrypt. The second letter will be labeled “Local Disk.” After you dismount your drive in VeraCrypt, eject the drive itself in Windows like you normally would.
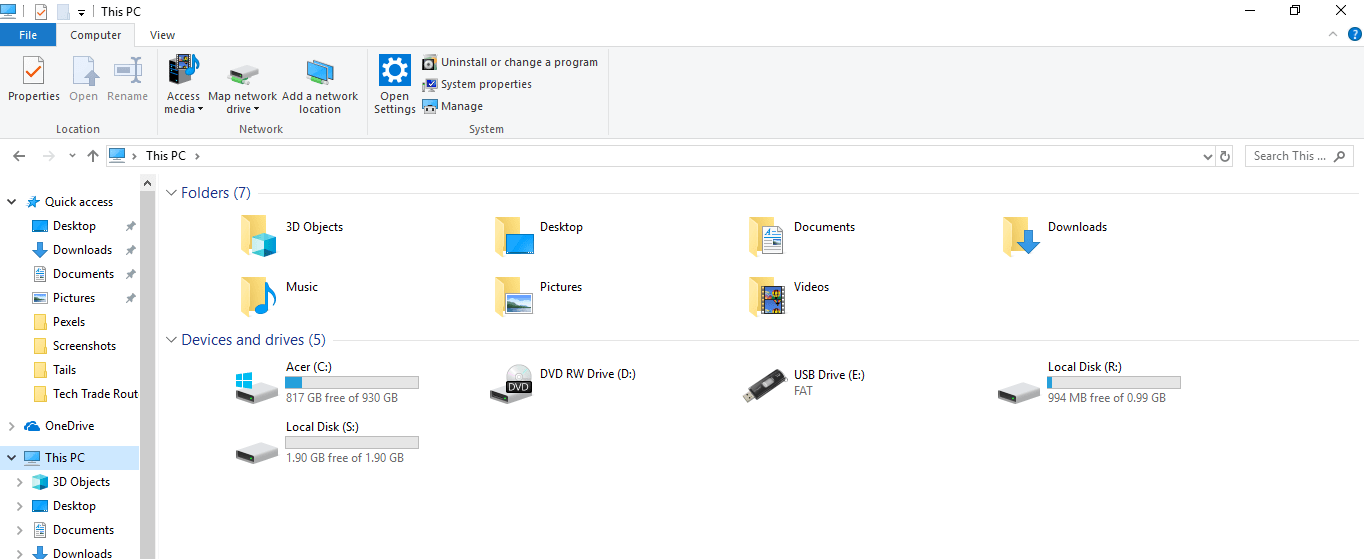
This is what VeraCrypt volumes look like in Windows File Explorer. Drive R is the file container. Drive S is the encrypted partition on the USB drive (drive E).
Now you know how to make encrypted file containers and how to encrypt a hard drive. Next time, I will take you through the steps of encrypting an entire hard drive with VeraCrypt.
[…] “Could I encrypt my whole computer?” I had already encrypted a folder and a flash drive with VeraCrypt. You can encrypt your hard drive with VeraCrypt (something I haven’t tried yet), but I wanted to […]